
Proxmox Homeserver Backup
Backup introduction
Did
you already heard about the three remarks that you never want to hear
from your system administrator or consulting.
I never saw this before!
Oh! It’s funny!
You have a Backup, do you?
Of course we must make sure that we are backing up our new server, then,
even if Proxmox is really stable an issue or error can always happen.
And don’t stop your backup after a few weeks or months because you
never had such an issue, because the in this case Murphy’s law will
strike, you probably already heard about it, it says that there is no
reason why the worst cannot happen. And remember, a good backup is
the one you never need, but once you need it your data should not be
days or weeks old.
This means we need an external disk or storage outside our proxmox server,
preferably in a separate room, I need here-for my old NAS server zhat
is loacted in the basement at home. You can use an USB disk too, but
make sure it’s big enough to keep all your data.
Backup of the Virtual machine or container
Backup of the proxmox confguration
Backup of the data on the ZFS pool
ZFS autosnapshot
But now it’s time to start we change to our terminal session.
Backup of the VM’s or container
NFS connection
If you want to use a NFS share, like I do, you must first set it up as share in the NAS. Now you can mount this share in your Proxmox server.
echo "backup:/data/Backup /backup nfs rw" >> /etc/fstab
mkdir /backup
mount -a
mkdir -p /backup/pvetest/{config,dump,borgbackup}
Of course you must use your NAS name and directory, but once done the share is now configured.
USB Disk connection
If you want to use an USB disk, forget the last steps, just connect your disk to the server and check if the system mounted it automatically. In the terminal session :
dmesg
[1034408.992911] scsi host28: usb-storage 2-5:1.0
[1034410.019036] scsi 28:0:0:0: Direct-Access WD My Passport 0820 1012 PQ: 0 ANSI: 6
[1034410.019219] scsi 28:0:0:1: Enclosure WD SES Device 1012 PQ: 0 ANSI: 6
[1034410.020505] sd 28:0:0:0: Attached scsi generic sg10 type 0
[1034410.020609] ses 28:0:0:1: Attached Enclosure device
[1034410.020671] ses 28:0:0:1: Attached scsi generic sg11 type 13
[1034410.021649] sd 28:0:0:0: [sdk] Spinning up disk…
[1034416.080627] ses 28:0:0:1: Wrong diagnostic page; asked for 1 got 8
[1034416.080632] ses 28:0:0:1: Failed to get diagnostic page 0x1
[1034416.080635] ses 28:0:0:1: Failed to bind enclosure -19
[1034417.090624] .ready
[1034417.091202] sd 28:0:0:0: [sdk] 3906963456 512-byte logical blocks: (2.00 TB/1.82 TiB)
[1034417.091508] sd 28:0:0:0: [sdk] Write Protect is off
[1034417.091509] sd 28:0:0:0: [sdk] Mode Sense: 47 00 10 08
[1034417.091800] sd 28:0:0:0: [sdk] No Caching mode page found
[1034417.091803] sd 28:0:0:0: [sdk] Assuming drive cache: write through
[1034417.180210] sdk: sdk1 sdk2
[1034417.181195] sd 28:0:0:0: [sdk] Attached SCSI disk
As you can see here our disk has been recognized as /dev/sdk , we just need to mount it. Create a new directory and mount the disk.
mkdir /backup
root@pve2:~# mount /dev/sdk2 /backup
root@pve2:~# df -h | grep backup
/dev/sdk2 1.9T 404G 1.5T 22% /backup
mkdir -p /backup/pvetest/{config,dump,borgbackup}
Setting up the backup
Change now to the webfrontend:
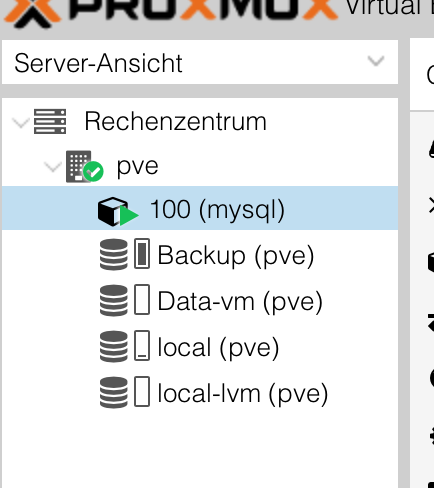
We must set our backup directory as storage, click in the left panel on Datacenter and then on the right panel on storage – Add and chose our directory (/backup/pvetest/dump).
And chose the type as VZDump backup file
Under node you can let it as is or chose our server name.
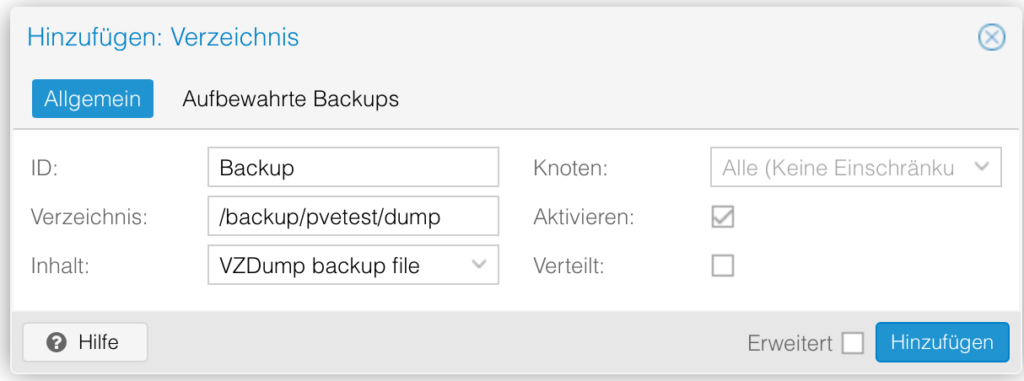
Click then on add.
After some time the backup storage is ready for use.
Now go to backup on the right panel.
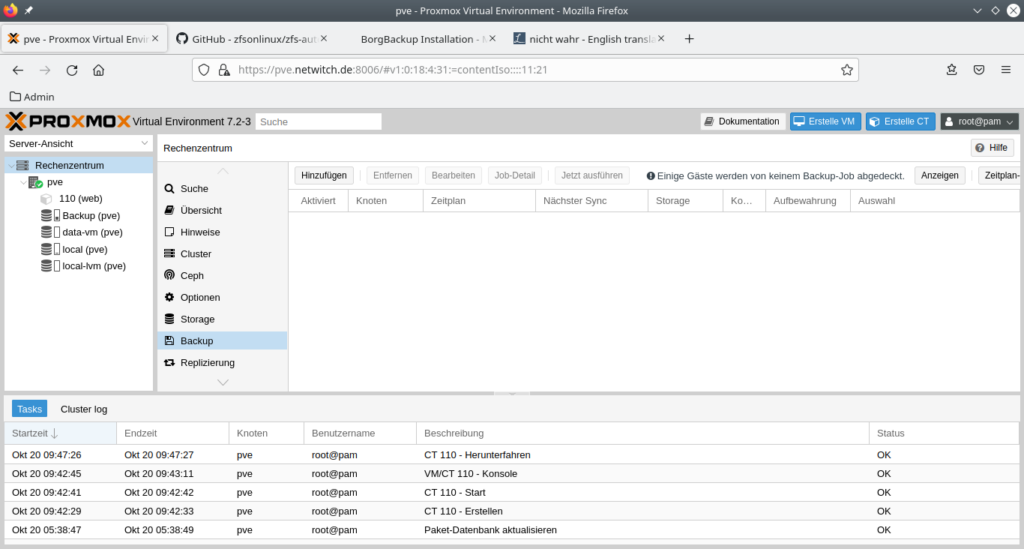
And chose add
I recommend to set up two different kind of backup, once a week a backkup of all your VM’s or container, and the other days only the most important server.

So we have it, now every VM or Container are backed up once a week.
Now we need to set up a daily backup for our important server.
Now click again on Add. And chose only the server that you really need.

I chose only one of both server.
The last step is to define how many backup you want to keep.

For example here, 4 daily backup and one weekly.
Backup of the Proxmox configuration
Why exert oneself? A program for this backup already exists, many thanks here to
# Author DerDanilo
# Contributors aboutte, xmirakulix, bootsie123, phidauex
For this script.
You can download it under https://github.com/marcosgus/proxmox/blob/master/prox_config_backup.sh
higlight the text with your mouse, copy it, change to the terminal session and type in:
mkdir -p /root/bin
cd /root/bin
vi /root/bin/pve_config_backup.sh
With „esc“, „:i“ change into editor mode, paste the lines copied, and go to DEFAULT_BACK_DIR change it to whatever you defined before e.G. /backup/pvetest/config.
I want to add just some words about the configuration’s directory, /etc/pve is a virtual Filesystem, in reality it’s located in a sqllite3 database ‚/var/lib/pve-cluster/config.db‘ the best way to backup this configuration is to use the internal sqlite3 backuptool, tis means, you can backup the config without stopping your proxmox server. For that we must adapt the script.
Between line 68 and 69 add the following. Just type „esc“ and then „:set nu“, you switch up the line counter, go to the beginning of the line 69 gehen and with „esc“ „:i“ change in the Editor Mode.
Add the following:
_filename9="$_tdir/proxmoxconfigDB.$_now.db"
Then in line 135 add this:
sqlite3 /var/lib/pve-cluster/config.db ".backup ${_filename9}"
Type again „esc“ „:wq“ to save your script.
Make your script executable and add it into the crontab.
In the terminal session type in:
chmod 750 /root/bin/pve_config_backup.sh
crontab -e
If you are prompted for your preferred editor, chose what you want to have, I take here „vi“ (or vim)
„esc“ „:i“ and type the following line
45 23 * * * /root/bin/pve_config_bckp.sh > /var/log/pve/bckp.log 2>&1
„esc“ „:wq“
The line above means only start the program /root/bin/pve_config_backup.sh at 23:45 hour every days, and write the logs to the file /var/log/pve/bckp.log and if somethng wrong happen wtite it in the same file (2>&1).
I would check the result of the backup periodically, just type in “cat /var/log/pve/bckp.log”, you can see the backup protocoll
Now just run this program and have a look at the results.
For that, copy the line from the crontab and paste it into the bash
crontab -l
45 23 * * * /root/bin/pve_config_bckp.sh > /var/log/pve/bckp.log 2>&1
Highlight from the last star to the end and copy and paste it into the bash, add a blank and „&“ , hit the return key.
The program will start in the background, you can monitor it with the rail program:
/root/bin/pve_config_bckp.sh > /var/log/pve/bckp.log 2>&1 &
tail -300f /var/log/pve/bckp.log
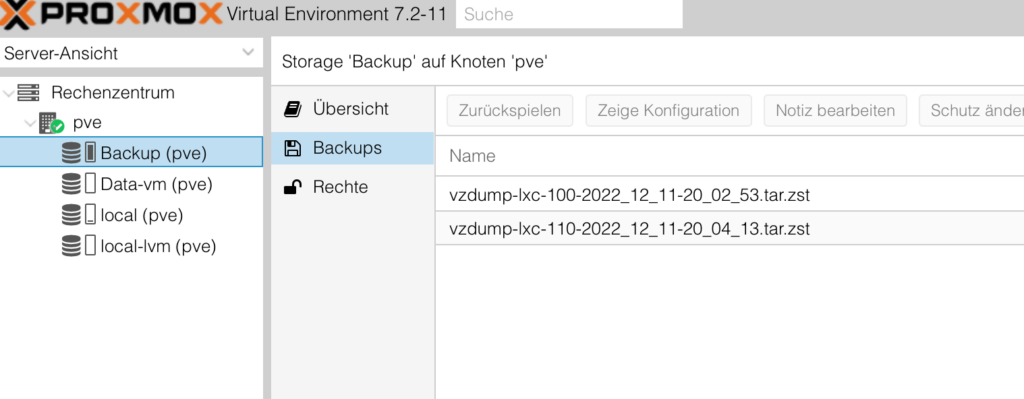
At the end you will see a new file in your backup directory.
/backup/pvetest/config/proxmox_backup_pve2.netwitch.de_2022-12-04.23.45.01.tar.gz
Tar files
/etc/./
/etc/./.pwd.lock
/etc/./adduser.conf
/etc/./aliases
/etc/./alternatives/
/etc/./alternatives/README
/etc/./alternatives/arptables
/etc/./alternatives/arptables-restore
/etc/./alternatives/arptables-save
/etc/./alternatives/awk
/etc/./alternatives/awk.1.gz
/etc/./alternatives/ebtables
/etc/./alternatives/ebtables-restore
/etc/./alternatives/ebtables-save
/etc/./alternatives/editor
The program create first a backup of the most important directories as well as a detailled configuration and hardware list of the server.
Backup of the ZFS Pool VDEV’s with BorgBackup
Until now we have only secured our proxmox environment. The data stored on the ZFS Pool and used as share are still not backed up e.g. film, photos, archive or any kind of personal data. Those must be backed up separatly. Now we will encounter a first issue, those data take a lot of capacity on the disks, at least for me, I have the following vdev’s defined
data/dvr
data/backup
data/bilder
data/musik
data/timemachine
data/serien
data/videos
data/videos-private
data/vm
data/youtube
Those directories are configured as NFS and/or samba share, I will explain why I chose this solution against a full NAS like Freenas for example in a future video.
All those directories use alltogether about 6,3 TB, if you want to back them up you need at least the same capacity in your backup storage. I am using borgbackup, this program is compressing and deduplicating the data, and this spares a lot of capacity. For example here the backup result for my environment.
Original size Compressed size Deduplicated size
All archives: 6.32 TB 6.08 TB 3.21 TB
As you can see the compression is not that good, this comes from the type of data that I have (alltogether 3,2 TB for films, music oder photos. All those data type are already compressed and there is not many capacity that can be spared here. But the deduplication can almost spare half the capacity of my data.
At first we must install borgbackup, then create a small script.
apt install -y python3-pip borgbackup
python3 -m pip install pip –upgrade
Now initialize the backup directory
root@pve:~/bin# borg init -e repokey-blake2 /backup/pvetest/borgbackup
Enter new passphrase:
Enter same passphrase again:
Do you want your passphrase to be displayed for verification? [yN]: N
By default repositories initialized with this version will produce security
errors if written to with an older version (up to and including Borg 1.0.8).
If you want to use these older versions, you can disable the check by running:
borg upgrade –disable-tam /backup/pvetest/borgbackup
See https://borgbackup.readthedocs.io/en/stable/changes.html#pre-1-0-9-manifest-spoofing-vulnerability for details about the security implications.
IMPORTANT: you will need both KEY AND PASSPHRASE to access this repo!
Use "borg key export" to export the key, optionally in printable format.
Write down the passphrase. Store both at safe place(s).
You will be prompted for a password for the encryption of your data on the disk.
Just follow the instruction. And please secure your password and the key, without them it is not possible to retrieve your data from the backup. If ypu don’t want any encryption just initialize with:
borg init -e none /backup/pvetest/borgbackup
Here the different possibilitiesfor the password/encryption mode:
repokey and keyfile |
use AES-CTR-256 for encryption and HMAC-SHA256 for authentication in an encrypt-then-MAC (EtM) construction. The chunk ID hash is HMAC-SHA256 as well (with a separate key). These modes are compatible with Borg 1.0.x. |
repokey-blake2 and keyfile-blake2 |
are also authenticated encryption modes, but use BLAKE2b-256 instead of HMAC-SHA256 for authentication. The chunk ID hash is a keyed BLAKE2b-256 hash. These modes are new and not compatible with Borg 1.0.x. |
authenticated |
mode uses no encryption, but authenticates repository contents through the same HMAC-SHA256 hash as the repokey and keyfile modes (it uses it as the chunk ID hash). The key is stored like repokey. This mode is new and not compatible with Borg 1.0.x. |
authenticated-blake2 |
is like authenticated, but uses the keyed BLAKE2b-256 hash from the other blake2 modes. This mode is new and not compatible with Borg 1.0.x. |
none |
mode uses no encryption and no authentication. It uses SHA256 as chunk ID hash. This mode is not recommended, you should rather consider using an authenticated or authenticated/encrypted mode. This mode has possible denial-of-service issues when running borg create on contents controlled by an attacker. Use it’s only for new repositories where no encryption is wanted and when compatibility with 1.0.x is important. If compatibility with 1.0.x is not important, use authenticated-blake2 or authenticated instead. |
If you want to keep your backups in the net a password and encryption is crucial.
Now our backup script:
#!/bin/bash
##################################
### Beispieldaten:
### logDirectory="/var/log/pve/"
### backupDiscMount="/backup/pvetest/borgbackup/"
### borgBackupDirs=" List of the directories that you want to backup”
##################################
export BORG_PASSPHRASE=’MyS3cr3tP@ssWort‘
export BORG_UNKNOWN_UNENCRYPTED_REPO_ACCESS_IS_OK=yes
export BORG_RELOCATED_REPO_ACCESS_IS_OK=yes
startTime=$(date +%s)
currentDate=$(date –date @"$startTime" +"%Y%m%d_%H%M%S")
currentDateReadable=$(date –date @"$startTime" +"%d.%m.%Y – %H:%M:%S")
logDirectory="/var/log/pve"
logFile="${logDirectory}/${currentDate}.log"
backupDiscMount="/backup/pvetest/borgbackup"
borgRepository="${backupDiscMount}"
borgBackupDirs="/root /data/bilder /data/videos"
if [ ! -d "${logDirectory}" ]
then
mkdir -p "${logDirectory}"
fi
errorecho() { cat <<< "$@" 1>&2; }
exec >>(tee -i "${logFile}")
exec 2>&1
if [ "$(id -u)" != "0" ]
then
errorecho "ERROR: This script must be run as root!"
exit 1
fi
echo -e "\n###### Start des Backups: ${currentDateReadable} ######\n"
echo -e "Daten werden zusammengestellt"
echo -e "\nBackup mit borgbackup"
borg create –stats $borgRepository::"${currentDate}" $borgBackupDirs
echo
borg prune –progress –stats $borgRepository –keep-within=7d –keep-weekly=2
borg compact $borgRepository
endTime=$(date +%s)
endDateReadable=$(date –date @"$endTime" +"%d.%m.%Y – %H:%M:%S")
duration=$((endTime-startTime))
durationSec=$((duration % 60))
durationMin=$(((duration / 60) % 60))
durationHour=$((duration / 3600))
durationReadable=$(printf "%02d Stunden %02d Minuten %02d Sekunden" $durationHour $durationMin $durationSec)
echo -e "\n###### Ende des Backups: ${endDateReadable} (${durationReadable}) ######\n"
echo -e "Plattenbelegung:\n"
df -h ${backupDiscMount}
Just create the new directories if needed and add one line in the crontab.
mkdir -p /var/log/pve /backup/pvetest/borgbackup
echo "15 0 * * * /root/bin/backup.sh > /var/log/pve/backup_data.log 2>&1" >> /var/spool/cron/crontabs/root
Anschließend crontab aufrufen und einfach speichern
crontab -e
esc :wq
crontab -l
For control
Of course you need to adapt the directories to your environment
ZFS automated snapshot
One of the advantage of ZFS is it’s snapshot possibility. Snapshot in ZFS takes almost no space on disk. That means you can follow the changes on your important vdev and in case of an error ( file erased, or overwritten, etc… ) you are able to restore it from snapshot.
We don’t have to do it manually, again some people have done an amazing job and created already such a program. We just have to download It and install a few add-on on the Operating system.
Login as root
apt install -y make gcc
then:
wget https://github.com/zfsonlinux/zfs-auto-snapshot/archive/upstream/1.2.4.tar.gz
tar -xzf 1.2.4.tar.gz
cd zfs-auto-snapshot-upstream-1.2.4
make install
The program is now installed and configured, we just need to define which vdev should be included in the snapshots.
Without any other configuration the program is doing snapshot of every pool and vdev’s automatically, it create a snapshot every 15 min, it’s named frequent snapshot and then it’s going further:
4 frequents ==> hourly
24 Hourly ==> daily
8 daily ==> weekly
31 daily ==> monthly
12 monthly
I would recommand to deactivate the snapshot completely from the ZFS pool itself and configure any vdev as requested, you have to decide if and how many snapshot you need for one vdev, I would avoid autosnapshot on the data/vm vdev, as snapshot for this vdev are being done on the webfrontend of proxmox. For our example here I will create a new vdev data/videos we could set that up as following:
zfs create -oxattr=sa -ocompression=lz4 -oatime=off -orecordsize=16k -omountpoint=/data/videos data/videos
zfs set com.sun:auto-snapshot=false data
zfs set com.sun:auto-snapshot=true data/videos
zfs set com.sun:auto-snapshot:monthly=false data/videos
zfs set com.sun:auto-snapshot:weekly=true,keep=8 data/videos
zfs set com.sun:auto-snapshot:daily=true data/videos
zfs set com.sun:auto-snapshot:hourly=true data/videos
zfs set com.sun:auto-snapshot:frequent=true data/videos
After a few hours you can control the result of this setup :
zfs list -t snapshot
Until now we have took care of our server and of the virtual machine and the data, we must now check if those backup can be used for a restore.
Restore from a complete data loss (Disaster recovery)
Restore proxmox server
We have now four different backups
VM and Container backup.sh
Konfiguration’s backup
Borgbackup our ZFS Pool
zfs snapshots
Now the recovery depend on the type of issue that we have
Complete data and/or server loss (fire, coffee pot or mug, Football (don’t laugh it happend to me), storm with lightning strike, etc… ==> here we will need Backup 2, 1 and 3
Virtual Maschine crash or don’t start anymore after an unlucky update ==> Backup 1
File erased or destroyed ==> Backup 1 oder 4 oder eine Mischung aus Backup 1 und 4
First step is to check if the hardware is still working normally, if necessary destroyed part must be replaced, or the server must be rebuild from scratch.
Next step:
Recovery after disaster
Proxmox new installation
Control if the disk in the ZFS Pool are online (Open webfrontend and log in)
After the server reboot we have to stop the services running:
for
i in pve-cluster pvedaemon vz qemu-server; do systemctl stop $i ;
done
ZFS Pool has been recognized during boot and is mounted ==> Nothing to do
ZFS is not here ==> You can still try to import the pool
3. If the disks were not part of the disaster you should be able to bring your pool online without dataloss. Here the two possibilities.
First with:
zpool status -v
no pools available
ZFS Pool is was not recognized by the system, you can try to do it manually
zpool import
pool: data
id: 14024415627059556521
state: ONLINE
action: The pool can be imported using its name or numeric identifier.
config:
data ONLINE
raidz1-0 ONLINE
scsi-0QEMU_QEMU_HARDDISK_drive-scsi4 ONLINE
scsi-0QEMU_QEMU_HARDDISK_drive-scsi3 ONLINE
scsi-0QEMU_QEMU_HARDDISK_drive-scsi2 ONLINEProxmox new installation
Control if the disk in the ZFS Pool are online (Open webfrontend and log in)
After the server reboot we have to stop the services running:
for i in pve-cluster pvedaemon vz qemu-server; do systemctl stop $i ; done
If the disks were not part of the disaster you should be able to bring your pool online without dataloss. Here the two possibilities.
ZFS Pool has been recognized during boot and is mounted ==> Nothing to do
ZFS is not here ==> You can still try to import the pool
First with:
zpool status -v
no pools available
ZFS Pool is was not recognized by the system, you can try to do it manually
zpool import
pool: data
id: 14024415627059556521
state: ONLINE
action: The pool can be imported using its name or numeric identifier.
config:
data ONLINE
raidz1-0 ONLINE
scsi-0QEMU_QEMU_HARDDISK_drive-scsi4 ONLINE
scsi-0QEMU_QEMU_HARDDISK_drive-scsi3 ONLINE
scsi-0QEMU_QEMU_HARDDISK_drive-scsi2 ONLINE
scsi-0QEMU_QEMU_HARDDISK_drive-scsi1 ONLINE
And now just import it:
zpool import data
root@pve:~# zpool status
pool: data
state: ONLINE
scan: scrub repaired 0B in 00:00:04 with 0 errors on Sun Dec 11 00:24:05 2022
config:
NAME STATE READ WRITE CKSUM
data ONLINE 0 0 0
raidz1-0 ONLINE 0 0 0
scsi-0QEMU_QEMU_HARDDISK_drive-scsi4 ONLINE 0 0 0
scsi-0QEMU_QEMU_HARDDISK_drive-scsi3 ONLINE 0 0 0
scsi-0QEMU_QEMU_HARDDISK_drive-scsi2 ONLINE 0 0 0
scsi-0QEMU_QEMU_HARDDISK_drive-scsi1 ONLINE 0 0 0
errors: No known data errors
In this case everything is good, you just have to restore the configuration. If only one disk is missing, after the import you will get something like that:
zpool status -v
pool: data
state: DEGRADED
status: One or more devices could not be used because the label is missing or
invalid. Sufficient replicas exist for the pool to continue
functioning in a degraded state.
action: Replace the device using ‚zpool replace‘.
see: https://openzfs.github.io/openzfs-docs/msg/ZFS-8000-4J
scan: scrub repaired 0B in 00:00:04 with 0 errors on Sun Dec 11 00:24:05 2022
config:
NAME STATE READ WRITE CKSUM
data DEGRADED 0 0 0
zpool import data
root@pve:~# zpool status
pool: data
state: ONLINE
scan: scrub repaired 0B in 00:00:04 with 0 errors on Sun Dec 11 00:24:05 2022
config:
NAME STATE READ WRITE CKSUM
data ONLINE 0 0 0
raidz1-0 ONLINE 0 0 0
scsi-0QEMU_QEMU_HARDDISK_drive-scsi4 ONLINE 0 0 0
scsi-0QEMU_QEMU_HARDDISK_drive-scsi3 ONLINE 0 0 0
scsi-0QEMU_QEMU_HARDDISK_drive-scsi2 ONLINE 0 0 0
scsi-0QEMU_QEMU_HARDDISK_drive-scsi1 ONLINE 0 0 0
errors: No known data errors
In this case everything is good, you just have to restore the configuration. If only one disk is missing, after the import you will get something like that:
zpool status -v
pool: data
state: DEGRADED
status: One or more devices could not be used because the label is missing or
invalid. Sufficient replicas exist for the pool to continue functioning in a degraded state.
action: Replace the device using ‚zpool replace‘.
raidz1-0 DEGRADED 0 0 0
7723795709861257045 UNAVAIL 0 0 0 was /dev/disk/by-id/scsi-0QEMU_QEMU_HARDDISK_drive-scsi4-part1
scsi-0QEMU_QEMU_HARDDISK_drive-scsi3 ONLINE 0 0 0
scsi-0QEMU_QEMU_HARDDISK_drive-scsi2 ONLINE 0 0 0
scsi-0QEMU_QEMU_HARDDISK_drive-scsi1 ONLINE 0 0 0
Change the faulted disk and after that repair the ZFS pool
zpool replace -f data 7723795709861257045 /dev/sdd
root@pve:~# zpool status -v
pool: data
state: DEGRADED
scan: resilvered 213M in 00:00:04 with 0 errors on Sun Dec 11 14:25:56 2022
config:
NAME STATE READ WRITE CKSUM
data DEGRADED 0 0 0
raidz1-0 DEGRADED 0 0 0
replacing-0 DEGRADED 0 0 0
7723795709861257045 FAULTED 0 0 0 was /dev/disk/by-id/scsi-0QEMU_QEMU_HARDDISK_drive-scsi4-part1
sdd ONLINE 0 0 0
scsi-0QEMU_QEMU_HARDDISK_drive-scsi3 ONLINE 0 0 0
scsi-0QEMU_QEMU_HARDDISK_drive-scsi2 ONLINE 0 0 0
scsi-0QEMU_QEMU_HARDDISK_drive-scsi1 ONLINE 0 0 0
errors: No known data errors
As we can see here, the disk is being resilvered, as soon as the this is finished you will have a healthy poool again.
zpool status -v
pool: data
state: ONLINE
scan: scrub repaired 0B in 00:00:03 with 0 errors on Sun Dec 11 14:26:09 2022
config:
NAME STATE READ WRITE CKSUM
data ONLINE 0 0 0
raidz1-0 ONLINE 0 0 0
sdd ONLINE 0 0 0
scsi-0QEMU_QEMU_HARDDISK_drive-scsi3 ONLINE 0 0 0
scsi-0QEMU_QEMU_HARDDISK_drive-scsi2 ONLINE 0 0 0
scsi-0QEMU_QEMU_HARDDISK_drive-scsi1 ONLINE 0 0 0
errors: No known data errors
If you lost more than one disk ( for a RAIDZ1) then you must recreate the ZFS pool completely with all vdev’s, you can have some help in the last backup logs, once any vdev have been recreated we can go to the next step
And now just import it:
zpool import data
root@pve:~# zpool status
pool: data
state: ONLINE
scan: scrub repaired 0B in 00:00:04 with 0 errors on Sun Dec 11 00:24:05 2022
config:
NAME STATE READ WRITE CKSUM
data ONLINE 0 0 0
raidz1-0 ONLINE 0 0 0
scsi-0QEMU_QEMU_HARDDISK_drive-scsi4 ONLINE 0 0 0
scsi-0QEMU_QEMU_HARDDISK_drive-scsi3 ONLINE 0 0 0
scsi-0QEMU_QEMU_HARDDISK_drive-scsi2 ONLINE 0 0 0
scsi-0QEMU_QEMU_HARDDISK_drive-scsi1 ONLINE 0 0 0
errors: No known data errors
In this case everything is good, you just have to restore the configuration. If only one disk is missing, after the import you will get something like that:
zpool status -v
pool: data
state: DEGRADED
status: One or more devices could not be used because the label is missing or
invalid. Sufficient replicas exist for the pool to continue
functioning in a degraded state.
action: Replace the device using ‚zpool replace‘.
see: https://openzfs.github.io/openzfs-docs/msg/ZFS-8000-4J
scan: scrub repaired 0B in 00:00:04 with 0 errors on Sun Dec 11 00:24:05 2022
config:
NAME STATE READ WRITE CKSUM
data DEGRADED 0 0 0
raidz1-0 DEGRADED 0 0 0
7723795709861257045 UNAVAIL 0 0 0 was /dev/disk/by-id/scsi-0QEMU_QEMU_HARDDISK_drive-scsi4-part1
scsi-0QEMU_QEMU_HARDDISK_drive-scsi3 ONLINE 0 0 0
scsi-0QEMU_QEMU_HARDDISK_drive-scsi2 ONLINE 0 0 0
scsi-0QEMU_QEMU_HARDDISK_drive-scsi1 ONLINE 0 0 0
Change the faulted disk and after that repair the ZFS pool
zpool replace -f data 7723795709861257045 /dev/sdd
root@pve:~# zpool status -v
pool: data
state: DEGRADED
scan: resilvered 213M in 00:00:04 with 0 errors on Sun Dec 11 14:25:56 2022
config:
NAME STATE READ WRITE CKSUM
data DEGRADED 0 0 0
raidz1-0 DEGRADED 0 0 0
replacing-0 DEGRADED 0 0 0
7723795709861257045 FAULTED 0 0 0 was /dev/disk/by-id/scsi-0QEMU_QEMU_HARDDISK_drive-scsi4-part1
sdd ONLINE 0 0 0
scsi-0QEMU_QEMU_HARDDISK_drive-scsi3 ONLINE 0 0 0
scsi-0QEMU_QEMU_HARDDISK_drive-scsi2 ONLINE 0 0 0
scsi-0QEMU_QEMU_HARDDISK_drive-scsi1 ONLINE 0 0 0
errors: No known data errors
As we can see here, the disk is being resilvered, as soon as the this is finished you will have a healthy poool again.
zpool status -v
pool: data
state: ONLINE
scan: scrub repaired 0B in 00:00:03 with 0 errors on Sun Dec 11 14:26:09 2022
config:
NAME STATE READ WRITE CKSUM
data ONLINE 0 0 0
raidz1-0 ONLINE 0 0 0
sdd ONLINE 0 0 0
scsi-0QEMU_QEMU_HARDDISK_drive-scsi3 ONLINE 0 0 0
scsi-0QEMU_QEMU_HARDDISK_drive-scsi2 ONLINE 0 0 0
scsi-0QEMU_QEMU_HARDDISK_drive-scsi1 ONLINE 0 0 0
errors: No known data errors
If you lost more than one disk ( for a RAIDZ1) then you must recreate the ZFS pool completely with all vdev’s, you can have some help in the last backup logs, once any vdev have been recreated we can go to the next step
Restore of the data in the ZFS Pool
If your ZFS pool was destroyed too , it must be restored, if you need some help for the ZFS and vdev configuration you can have a look at the backup config file. Copy the last backup file from /backup/pvetest/config to /root
mkdir -p /root/restore
cp /backup/pvetest/config/proxmox_backup_pve.netwitch.de_2022-12-11.14.53.47.tar.gz /root/restore
cd /root/restore
tar -xvzf proxmox_backup_pve.netwitch.de_2022-12-11.14.53.47.tar.gz
tail -100 var/tmp/proxmox-P6ewPaJB/proxmoxreport.2022-12-11.19.18.14.txt
# zpool status
pool: data
state: ONLINE
scan: scrub repaired 0B in 00:00:04 with 0 errors on Sun Dec 11 00:24:05 2022
config:
NAME STATE READ WRITE CKSUM
data ONLINE 0 0 0
raidz1-0 ONLINE 0 0 0
sdd ONLINE 0 0 0
sde ONLINE 0 0 0
sdf ONLINE 0 0 0
sdg ONLINE 0 0 0
errors: No known data errors
# zpool list -v
NAME SIZE ALLOC FREE CKPOINT EXPANDSZ FRAG CAP DEDUP HEALTH ALTROOT
data 79.5G 869M 78.7G – – 0% 1% 1.00x ONLINE –
raidz1-0 79.5G 869M 78.7G – – 0% 1.06% – ONLINE
sdd 20.0G – – – – – – – ONLINE
sde 20.0G – – – – – – – ONLINE
sdf 20.0G – – – – – – – ONLINE
sdg 20.0G – – – – – – – ONLINE
# zfs list
NAME USED AVAIL REFER MOUNTPOINT
data 650M 57.0G 32.9K /data
data/vm 649M 57.0G 34.4K /data/vm
data/vm/subvol-100-disk-0 324M 11.7G 324M /data/vm/subvol-100-disk-0
data/vm/subvol-110-disk-0 324M 11.7G 324M /data/vm/subvol-110-disk-0
You have here all necessary informations about your pool and vdev’s and can create those (Howto is under ZFS configuration in the guide )
As soon as the pool has been recreated it should appear in the web frontend, if not you will have to restore this point too.
Now we still have to restore our data from the backup. First let see which backup we can use:
root@pve:~/bin# borg list /backup/pvetest/borgbackup/
Enter passphrase for key /backup/pvetest/borgbackup:
20221211_210728 Sun, 2022-12-11 21:07:29 [0c6720223308ffefc883a4ea5408157819cd69819f68743cc94e73708b7d2c00]
We can now mount this backup
root@pve:~/bin# mkdir /restore
root@pve:~/bin# borg mount /backup/pvetest/borgbackup::20221211_210728 /restore
Enter passphrase for key /backup/pvetest/borgbackup:
root@pve:~/bin# cd /restore
root@pve:/restore# ll
total 0
drwxr-xr-x 1 root root 0 Dec 11 21:14 data
drwx—— 1 root root 0 Dec 11 20:56 root
Our data are under /restore/data the root directory is only here if some script should needed.
Jetzt nur noch die daten zurückspielen
rsync -av /restore/data/videos/ /data/videos/
You must do the same for each subdirectory under /restore/data , this restore can take a long time, many hours up to days, depending on the disk occupancy. When this part is finished we can start restoring the configuration.
Restore the configuration
Under
/backup/pvetest/config copy the last backup to /root/bin
z.B.:
cp
/backup/pvetest/config/proxmox_backup_pve.netwitch.de_2022-12-11.14.53.47.tar.gz
/root/bin/
cd
/root/bin
Die
Datei pve_config_restore.sh erstellen
vi
pve_config_restore.sh
„esc“
„:i“
#!/bin/bash
# Version 0.2.3
# Date 04.18.2022
# Author razem-io
# Contributors
# Very basic restore script
# based on https://github.com/DerDanilo/proxmox-stuff/issues/5
# Restores backup from pve_config_backup.sh
set -e
if [[ $# -eq 0 ]] ; then
echo „Argument missing -> restore.sh proxmox_backup_proxmoxhostname_2017-12-02.15.48.10.tar.gz“
exit 0
fi
for i in pve-cluster pvedaemon vz qemu-server; do systemctl stop ${i} ;done || true
FOLDER_1=“./$1_1″
FOLDER_2=“./$1_2″
mkdir „$FOLDER_1“
mkdir „$FOLDER_2“
tar -zxvf $1 -C „$FOLDER_1“
find „$FOLDER_1“ -name „*tar“ -exec tar -xf ‚{}‘ -C „$FOLDER_2“ \;
KONFIGDB=$(find „$FOLDER_1“ -name „*db“ -print)
for i in $(ls $FOLDER_2 | grep -v root);do rsync -av $FOLDER_2/${i}/ /${i}/ ;done
echo „restoring sqlite3 Database“
sqlite3 /var/lib/pve-cluster/config.db „.restore ${KONFIGDB}“
echo „Cleaning directories!“
rm -r „$FOLDER_1“ „$FOLDER_2“ || true
find /etc/pve -delete
read -p „Restore complete. Hit ‚Enter‘ to reboot or CTRL+C to cancel.“
shutdown -r now
„esc“ „:wq“
chmod
750 pve_config_restore.sh
./pve_config_restore.sh
proxmox_backup_pve.netwitch.de_2022-12-11.14.53.47.tar.gz
And
last reboot the server if the script don’t have done it already
init 6
Restore of the container und VM’s
Now we have to check if anything is running again, if not we have to restore our Vm’s and/or containers
Open the webfrontend in a browser e.G. https://pve.netwitch.de:8006
If anything is there and working, the restore is finished! Time to take a coffee!
If not, we still have some work to do. On the left panel click on the backup storage, if it’s missing you will have to recreate it ( siehe further above under NFS Connection).
On the right panel click on backup and search for the last backup for your VM’sd or container, highlight it and click above on restore.


Once you are receiving the message Task OK then the restore is finished and you can close this windows.
Your server is agin online and you can start it. Now you must restore all the server needed until everything is again here.
It’s all folk, but don’t be mistaken this procedure is very time-consuming if the ZFS pool has to be restored.
High availibility
Another solution is to set up a second proxmox server, configure the storage as high available with CephFS, in this case you are able to moive your VM’s and container from one PVE server to the other, and the crash of one PVE server would not impact your work that much, as you can take the VM’s and container up on the second server, but so a setup is a totally other approach of Proxmox and is not part of our Backup theme here. It could be the theme for future video and/or article.